HOW TO: Setup Custom Questions for a Bridal Interview or Online Booking
- Navigate to ‘Store Settings’ from the Main Menu icon
 in the top left corner
- From here, click Online Booking/Customer Interview on the left hand navigation
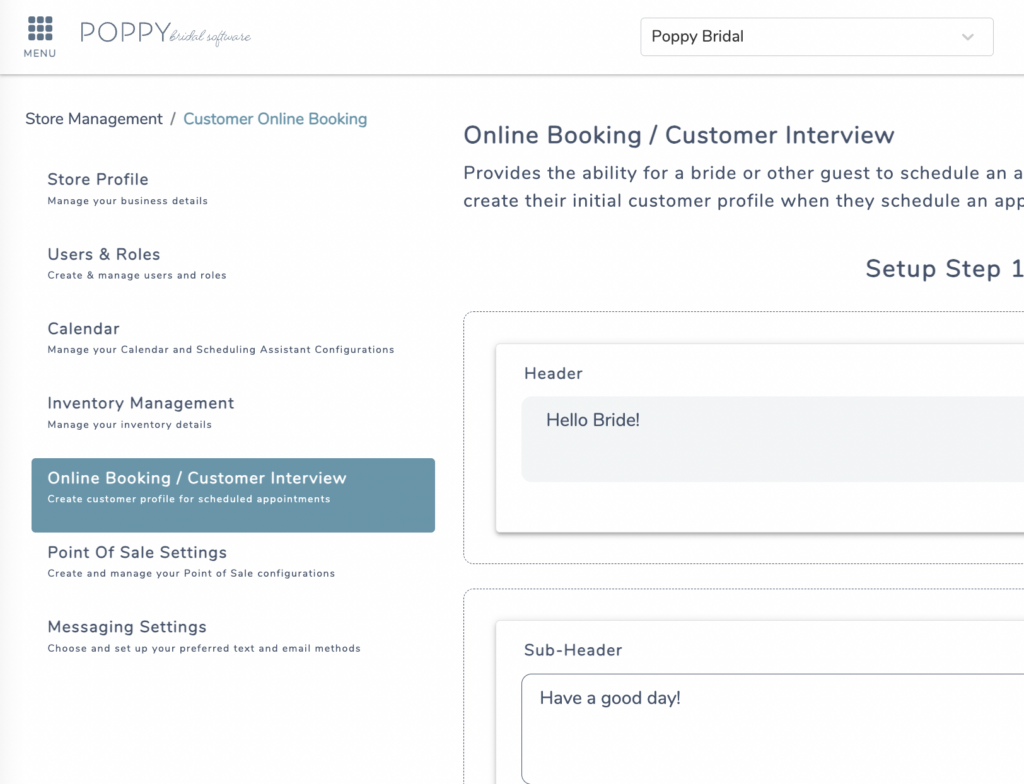
- Scroll to ‘Step 3: Customized Questions‘

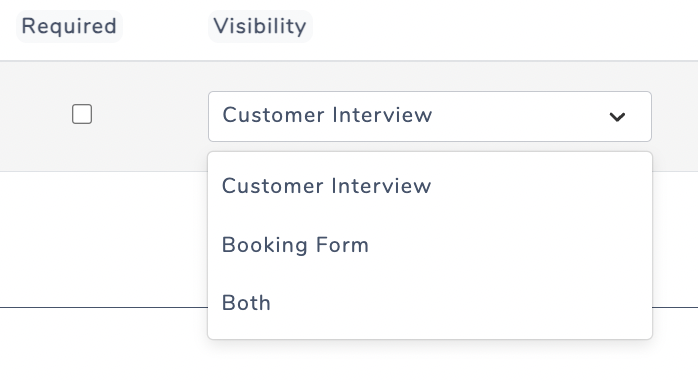
- Here you are able to ‘+ Add Questions‘ to a customer interview, your online booking form, or both!
- Choose a field type from the drop down, this designates what type of field the customer will be able to respond in
- Text: Allows the customer to reply to a question within a smaller text field

- Paragraph: Allows the customer to reply to a question within a larger text field

- Acknowledgement: Will prompt for 2 fields during set up, Question & Terms.
- On the form this question will result in a checkbox for the customer to acknowledge

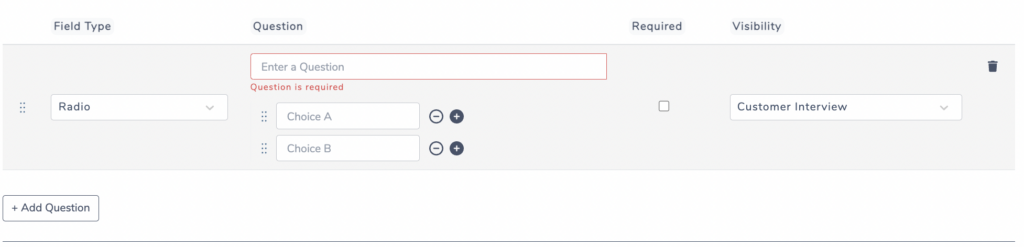
- Radio: Will prompt for 2 fields during set up, Question & Choices.
- The top field is used for the questions, while the bottom field are the choice to mark. If you’d like to add or remove a choice field, click the “+” or “-” buttons next to the question.
- Use this field type if you want your customers to only choose one option.
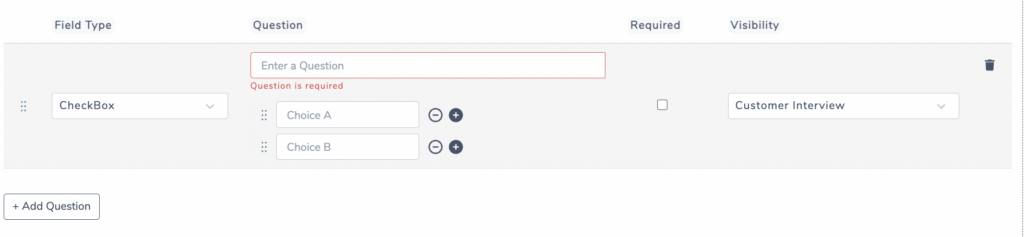
- Checkbox: This field type will prompt for 2 fields during set up, Question & Choices.
- The top field is used for the questions, while the bottom field are the choice to mark. If you’d like to add or remove a choice field, click the “+” or “-” buttons next to the question.
- Use this field type if you want to allow your customers to be able to choose more than one option.
- DatePicker: This field type will allow customers to select a date as a reply to a question.

Once you have your questions created you can select if you want your customers to be required to answer the questions and where you’d like them to live, the Customer Interview, Online Booking Form, or both.
When you are ready to make your questions live, click Publish.