HOW TO: Create New Sale
In the Poppy Point of Sale, you can create a new sale, edit an existing sale in progress or previously completed and view a summary of your transactions. The below instructions will walk you through how to create a new sale.
Creating a New Sale
Navigate to the ‘Point of Sale’ from the Main Menu icon ![]() in the top left corner.
in the top left corner.
- On the right side of the page, click on the green ‘+ Create New Sale‘ button
- From here, you have the option to create a new sale under an existing customer, create a new customer for the sale to be attributed to, or use the Quick Sale option to generate a general sale not linked to a particular customer.
- After selecting the customer you want the sale to recorded under, click ‘+Add Item/Stock’

- Next, type the item name, stock number, or vendor to search the drop down field or scan the SKU number for the item.
- Choose the item you’d like to sell, if you choose the item with a SKU starting with an (I) you will be asked to choose between selling the inventory item or a special order

- If you choose the item with a SKU starting with an (O) you will only be able to sell this item as a Special Order.
Note: SKUs starting with:
- I = Inventory
- O = Special Order
- R = Rental
- S = Service
- N = Non-Inventory
Discontinued or Unavailable items (SKUs starting with I) will not allow you to choose ‘Special Order’ when making a sales order.
If you choose an Item with
- Then choose the sales associate/stylist who made the sale from the drop down.
- Poppy Tip: If you have several employees, type their name for a quicker search.
- Click Save & Continue
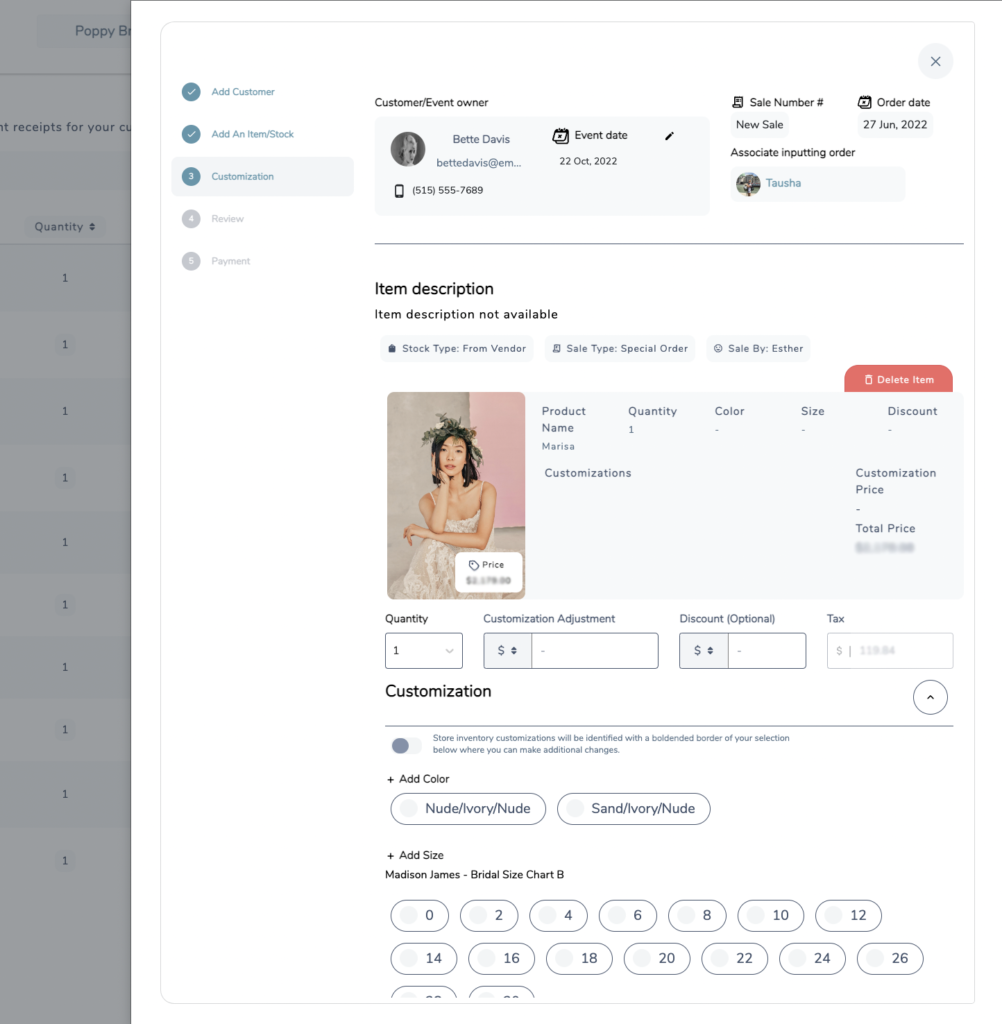
- Next select the item’s color, size, add in customization notes if applicable, and any pricing adjustments or discounts and notes about the purchase.

- Click the Review & Complete button at the bottom of page.
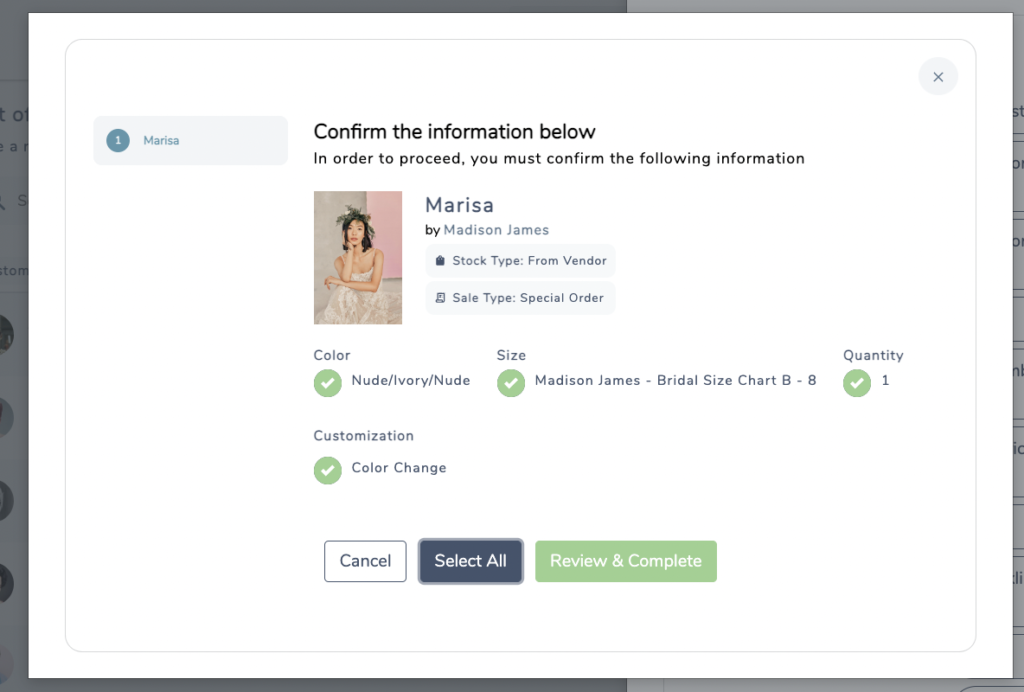
- Next, a confirmation pop-up will ask you to click each radio button to confirm your selections or click ‘Select All’ to automatically click the radio buttons. Then click Review & Complete

- Once confirmed, collect the type of T&C signature(s) you want for the purchase
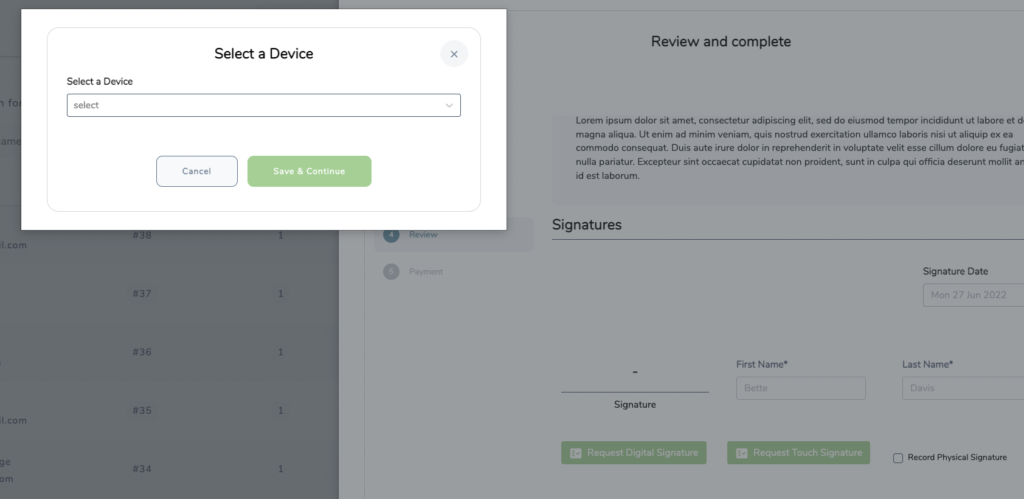
Request Digital Signature – this will prompt you to select the Clover® payment device you’d like to collect the signature on

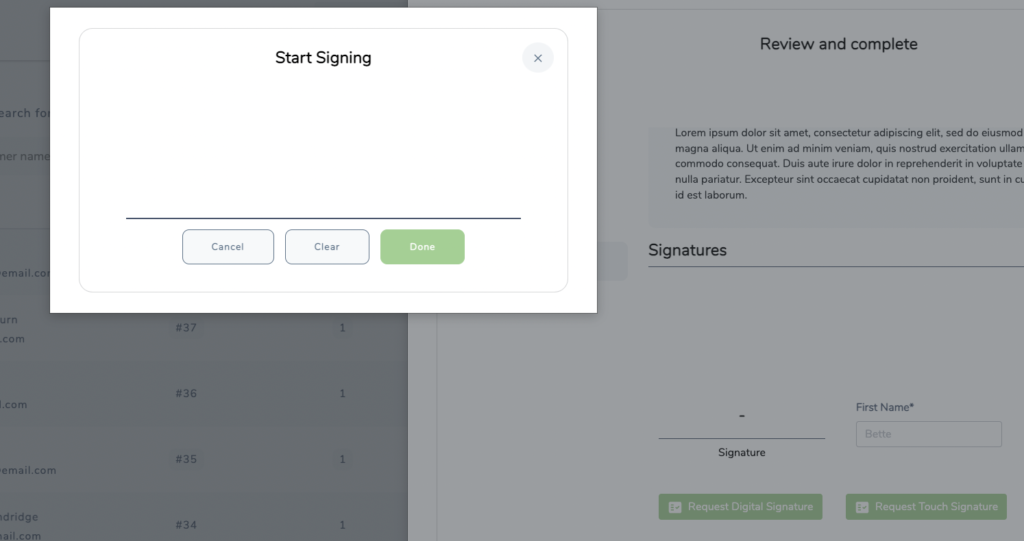
Touch Signature – this will prompt the device you are using to do the checkout (computer trackpad or mouse or tablet device) to collect the signature

Physical Signature – you will need to print your T&Cs for the customer for a wet signature.
- Next select your payment method: Card, Cash, Text-to-Pay, Email-to-pay, Other
Taking a Credit Card Payment
- Select ‘Card‘ for your payment method
- Select the payment device from the drop down
- If you previously collected a digital signature the payment device will automatically default to the same device.
- Enter the payment amount you want to collect.
- The total will default in this text box, but you can choose to delete and add in your own amount.
- Click ‘Pay Now’
- Next, your payment device will be prompted for a tip (if enabled), then will ask the customer to tap, dip or swipe their card.
- Choose how you’d like the payment allocated to the items on the sales order
- Allocation will default to split evenly across all items, you can change this by typing in the $ or % of allocation to each item.
- Note: Any additional fees will also be included in this allocation process.
- Once complete you will see the confirmed payment on the Poppy POS
- If a tip was given, you will need to assign the tip amount to the appropriate associate/stylist
- Then click ‘Complete‘
Taking a Cash Payment
- Select ‘Cash‘ for your payment method
- Choose the amount of cash you are accepting
- Choose if there was a tip for the transaction
- ‘Yes‘ – enter the full tip amount, then select the associate(s) receiving the tip and amount(s) each associate/stylist will get,
- ‘No‘
- Click ‘Record Payment’
- Allocate the paid amount to the items on the sales order
- Allocation will default to split evenly across all items, you can change this by typing in the $ or % of allocation to each item.
- Note: Any additional fees will also be included in this allocation process.
- Then click ‘Complete’
Using Text to Pay
- Select ‘Text to Pay’ for your payment method
- Enter payment amount or % of payment you’d like to collect
- Click the green ‘Enter Information‘ button
- To use the default customer information,
- Add the customers billing information, product description and how many days you’d like the link to be active
- To send a link to someone other than the customer, select the ‘other’ radio button
- Enter the information of the person paying
- Including mobile number, billing address, product description (in case they aren’t physically present, they’ll know what its for) and how many days you’d like the link to be active.
- Enter the information of the person paying
- To email the link, click ‘Save & Continue‘
Using Email to Pay
- Select ‘Email to Pay’ for your payment method
- Enter payment amount or % of payment you’d like to collect
- Click the green ‘Enter Information‘ button
- To use the default customer information,
- Add the customers billing information, product description and how many days you’d like the link to be active
- To send a link to someone other than the customer, select the ‘other’ radio button
- Enter the information of the person paying
- Including email address, billing address, product description (in case they aren’t physically present, they’ll know what its for) and how many days you’d like the link to be active.
- Enter the information of the person paying
- To email the link, click ‘Save & Continue‘
Taking an Other Payment
- Select ‘Other‘ for your payment method
- Enter payment amount
- Add a payment note ( i.e. check #, transaction id, etc.)
- Choose if there was a tip for the transaction
- If ‘Yes‘ – enter the full tip amount, then select the associate(s) receiving the tip and amount(s) each associate/stylist will get, then click Record Payment
- If ‘No‘ – Click Record Payment
- Then click ‘Complete’
To see how to use a Payment Plan checkout this video tutorial.
To make a payment to an existing sale, see article How To: Make Payments to Existing Sales
