HOW TO: Set Up Online Booking
Poppy’s online booking iframe can be set up on most if not all website builders that have the ability to add in a block of code. Below is how you configure the online booking form for your website. This can be done before or after adding the iframe to your website.
Configuring your Online Booking iframe:
- Navigate to the ‘Store Management’ from the Main Menu icon
 in the top left corner.
 - Select ‘Customer Online Booking’ from the left side bar menu
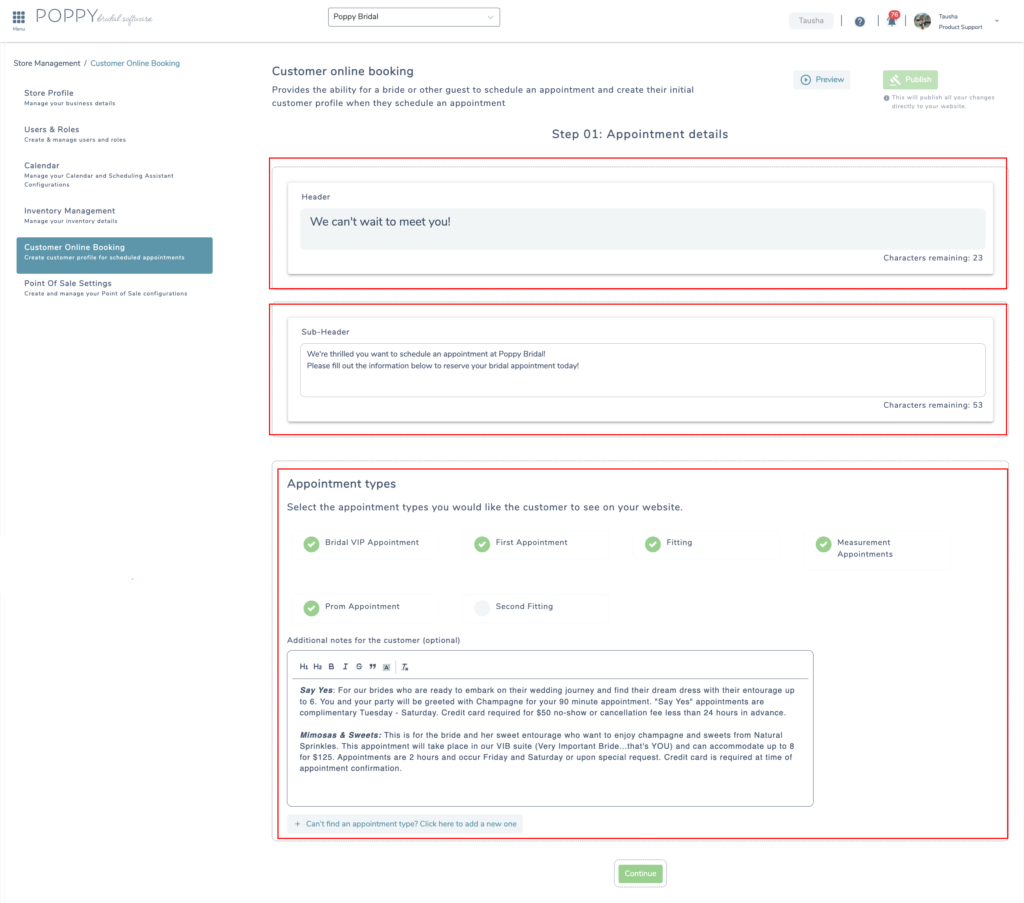
- Next, customize Step 01: Appointment details to fit your store’s voice/brand
- Header
- Sub-Header
- Appointment Types
- Next, customize Step 02: Contact Information to ensure you are collecting the info that is important to your bridal store.
- Header
- Sub-Header
- Details you’d like to display on the appointment form
- Do this by clicking the toggle to the right of the fields you want to show, when activated the toggle color will be green
- To ensure a field is required by your bridal customer to fill our check the ‘required field’ box under each attribute

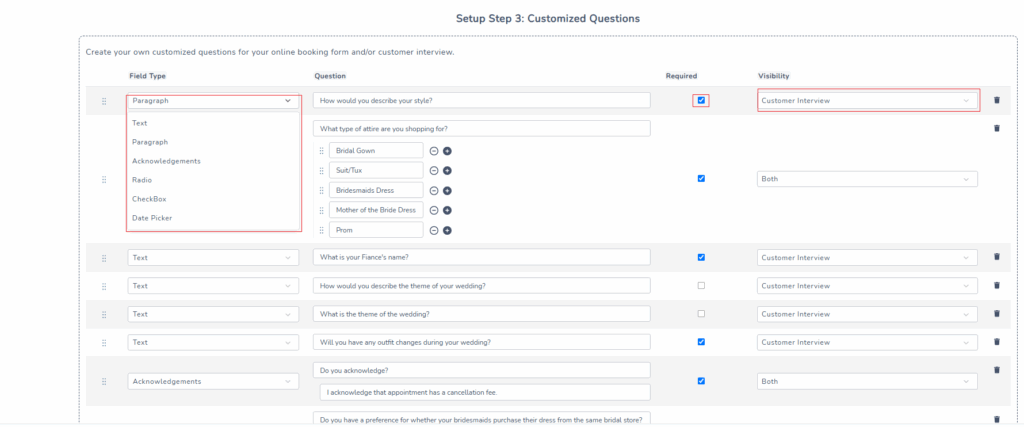
- Next, setup Step 03: Customized Questions to ensure you are collecting the info that is important to your bridal store.
- Create your own customized questions for your online booking form and/or customer interview.
- Note: You can add accept different types of responses based on the answer you’re looking for, like:
- Paragraph
- Text
- Acknowledgements
- Radio
- Checkbox
- Date Picker
- You can also determine whether the response is required by checking the ‘Required?’ box
- Lastly, you can select whether the repsonse should be visible on the customer interview, booking form, or both.
- Note: You can add accept different types of responses based on the answer you’re looking for, like:
- Create your own customized questions for your online booking form and/or customer interview.
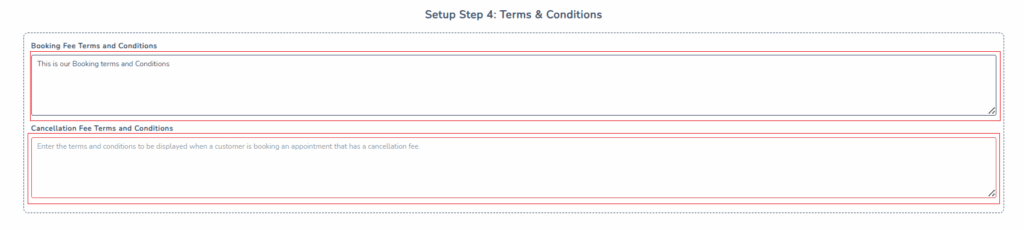
- Next, setup Step 04: Terms & Conditions
- Please note, there are two required terms and conditions sections:
- 1. Booking Fee Terms and Conditions – For terms and conditions to be displayed when a customer is booking an appointment with a booking fee
- 2. Cancellation Fee Terms and Conditions – For terms and conditions to be displayed when a customer is booking an appointment with a cancellation fee
- Click into the default message and add your own ‘terms and conditions’ for each section
- Next, customize your final message in Step 05: Success Message
- Click into the default message and add your own ‘success message’ after a bridal customer completes an appointment request
- Note: This appointment is not automatically confirmed on your calendar. After an appointment is booked online, you will have a notification in your Poppy Bridal software under ‘Pending Appointments’ within your Calendar view.
- Click into the default message and add your own ‘success message’ after a bridal customer completes an appointment request
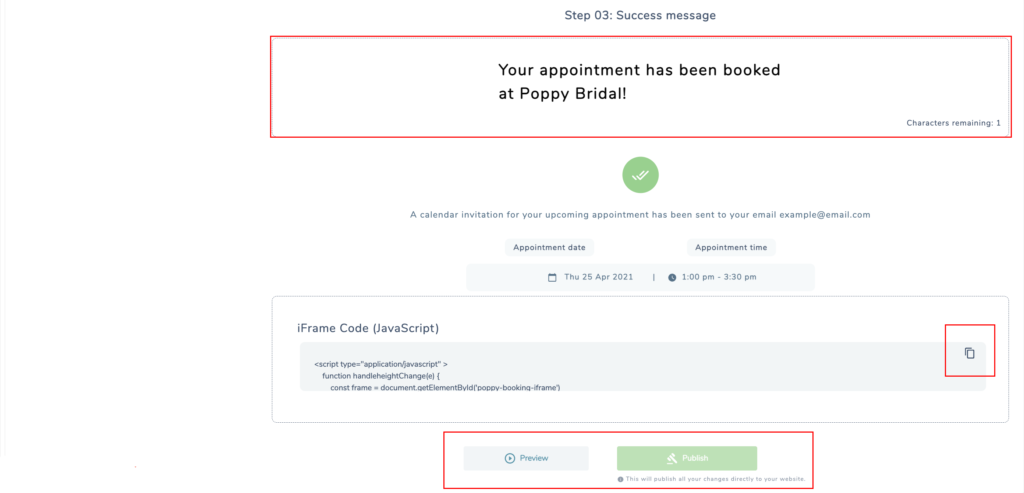
- To see any changes you’ve made before saving, click the ‘Preview‘ button at the bottom or top right corner of the screen.
- To save any and all customizations you’ve made to your online booking set up, click ‘Publish’ button
- Note: If you have already added the iframe code to your website and you need to update your online booking configuration, you can simply make the changes within the Store Settings > Customer Online Booking, then click ‘Publish‘. The code will automatically update on your website, no need to do anything directly on your website.